Mrs. Sell's Blog of Household Management

Archive for the category “cookware”

Bread-baking tip: winter edition

If your kitchen is way too cold for bread to rise, stick the dough in the oven with the light on — the light provides just enough heat to warm up the dough. Just be sure to take it out before turning the oven on!

bread rising in oven

(Honey-Wheat Bread recipe by Slate)

(Large Loaf Pan in Lapis by Le Creuset)

Quick caffeinated breakfast drink

This light breakfast is super quick and super simple. If I’m running out the door first thing in the morning, this is my first choice for getting something into my stomach. And if I use a canning jar and handy plastic lid, then there’s barely any clean-up!

What you need:

IMG_1726

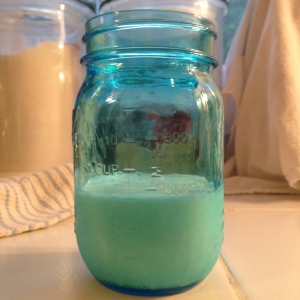
I love these vintage-style blue canning jars. Not all of my jars have measurement markings on the the side, but these do, so they’re perfect for this. I use the pint size because that leaves plenty of room to mix the drink.

What you do:

1) Pour six ounces of milk into the jar:

IMG_1727

2) Then pour in 2 ounces of coffee concentrate:

IMG_1729

3) Pour in your breakfast drink packet:

IMG_1730

4) Top with a plastic jar lid:

IMG_1732

5a) Agitate vigorously:

IMG_1733

5b) Maybe even more vigorously:

IMG_1734

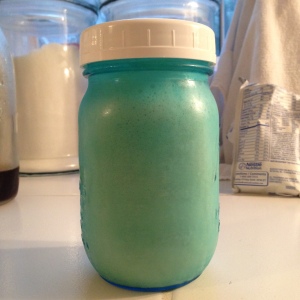
6) And it’s all frothy!

IMG_1735

7) You’re done! You’ve got your fat and protein from the milk, carbs and vitamins from the breakfast drink, and sweet, sweet caffeine of life from the coffee!

IMG_1736

I love the plastic canning jar lids; I use canning jars all the time, but I never actually can with them. So the plastic lids are more practical for me: they’re only one piece, they’re reusable, and they don’t rust. I use them for storing things at room temperature and in the fridge, and of course for using jars to mix drinks and salad dressing and stuff.

When I’m making this drink, depending on the flavor of coffee I have going, I usually use a chocolate or vanilla breakfast drink mix. Any of the chocolates would be good (milk, dark, malt), and the vanilla is good, but I’m not sure how the strawberry would go with coffee. I have yet to try it.

Sometimes in the winter I will heat the milk and coffee together on the stove, then stir the drink mix in at the end, but it’s not quite as good warm. The drink mix just doesn’t taste right hot; maybe because you’d expect it to taste like hot chocolate when it most certainly does not.

Once I start college next week, I fully expect this to become a daily routine.

Pretty things: futility

These are not exactly designed for autumn, but that wouldn’t make me hesitate a second about getting them…

lc minis des bois

…IF THEY EXISTED.

I love Le Creuset, but they are absolutely cruel with the discontinued stuff. They stop making it, and then it just disappears, except for the odd photo here and there on the internet, where people can stumble across it and then spend the rest of their lives ruing the fact that there is no way that they can acquire it.

Remember these?

winter twilight cocottes

Two years ago, these were readily available in the USA, and I didn’t get them to go with my other beauties because I thought I would have time… And it turns out I would have, IF I LIVED IN FREAKING AUSTRALIA. Now, the only place they’re available is from websites that “only ship to Australia and New Zealand,” thus depriving all the rest of us of the opportunity to improve our lives by owning these!

By the way, if anybody lives in Australia, I will pay you good money to order these and ship them to me.

And if anyone has a set of those Minis des Bois, I will also happily take them off of your hands. I have a bunch of green ones that are waiting to meet them for my autumn decorations…

Pretty vintage thing

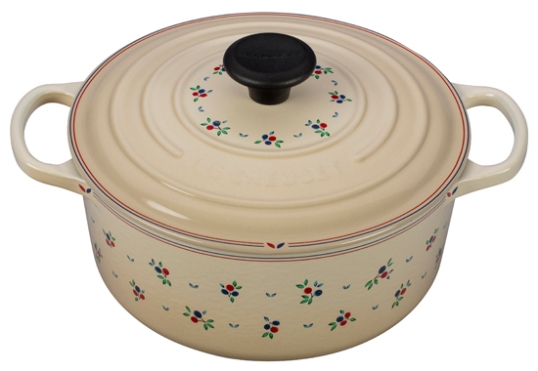
Oh, my goodness. This is so pretty:

le creuset petite fruits dutch oven

It’s a limited edition pot, inspired by a vintage Le Creuset pattern. I’m such a sucker for vintage editions! Fortunately, it’s $400, so I can’t even consider buying it.

Recipe: smashed burgers

Smashed burgers have taken the world by storm (relatively), and they’re SO EASY to make at home. This is honestly one of the fastest meals I can make.

I made these after Pioneer Woman featured them, although I saw the recipe first on Serious Eats. (By the way, Kenji’s book is available for pre-order! Buy it! Buy a dozen!)

Smashed burgers:

What you need:

  • 4 ounces 80%-lean ground beef per burger
  • salt and pepper
  • 1 slice of American cheese per burger
  • buns, with butter if you’re toasting them
  • whatever toppings your little heart desires, although these burgers are so flavorful they hardly need any!

What you do:

1) Preheat a griddle or skillet to hot.

2) While the griddle is heating up, butter your buns (using the soft butter in your butter bell)

buttered buns

and toast them before the grill gets too hot.

buns toasting

3) Measure out your beef into 2, 2-ounce balls per burger. That’s right, you’re actually making two small patties per burger.

meat balls weighed

For maximum accuracy, weigh the beef on a scale, but you can also do a good job with your hands. If you buy a pound of ground beef, you can hold it in both hands, then divide it in half. Repeat this until you have eight balls per pound. (I’ve found that my hands are remarkable good at dividing things evenly in half; I can tell by the weight and size I’m holding in each hand.)

4) Befor you start grilling the burgers, unwrap your American cheese, and stage whatever burger toppings you’re using on the toasted buns. The burgers cook really fast, and your hands will be full, so you won’t have time after.

5) Now this goes really quickly, so I wasn’t able to get good pictures of everything, but I’ll do my best to describe it: Place one ball of beef on the hot griddle, then immediately smash it flat with something large and flat (I use a giant metal spatula that I dipped in water so it wouldn’t stick, and a mug for pressing).

smashing

Do that to 2 balls of beef, then lightly sprinkle salt and pepper on each one.

patties 2

6) Cook them until the bottom is nice and brown and the top is just starting to look cooked through in places, then, using a heavy-duty, straight-edge spatula (or a metal bench scraper, or a wall paper stripper), scrape the burger up off the grill and flip it. You want to get every last bit of the browned bits that are going to want to stick to the pan. This is the hardest part; at least one of mine always falls apart, but I just shove it back together. (I need a better spatula.)

7) Immediately place the slice of American cheese onto one burger, then place the other burger on top.

burger finishing

8) Let it cook until the cheese melts, then scoop it up off the pan and drop it right onto the bun, and you’re done!

burgers done

For as simple as these are, they are SO GOOD. They are hot, flavorful, and filling, and don’t require any prep work or planning ahead (unless you have to thaw out the meat). Now if I would learn how to make my own French fries, I’d never have to get fast food again!

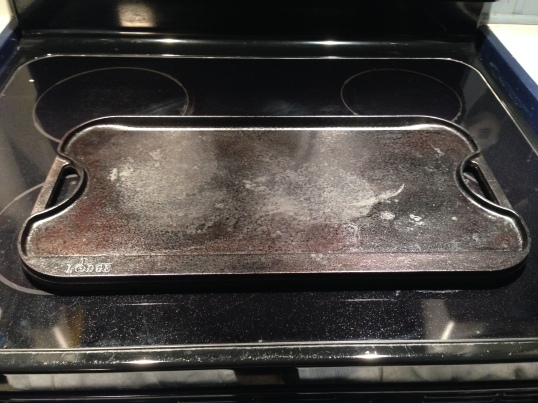
Lodge Reversible Pro Grid Iron Grill/Griddle on a glass-top stove

Can you use the Lodge Reversible Pro Grid Iron Grill/Griddle on a flat-top electric stove?

griddle flat

The short answer is yes, you can.

When we moved, I went from having a (very basic) gas stove to this glass-topped, electric monstrosity (gimme a ‘BOOOOO!!!!!). I could go on and on about the travesty of this type of stove (gimme a ‘HIIISSSSSSS!!!!), but for now let me focus on a basic challenge with them: usually, in order for the ‘burners’ to work properly, you need to have as much contact between them and the pan in question.

This causes problems from the get-go, because there are many pans that are not perfectly flat on the bottom. Inexpensive pans can warp slightly with use (I had a regular pancake griddle that didn’t sit quite flat; it was fine on the gas stove but I had to replace it after we moved), or, they can be shaped like this:

griddle ridges side

I’ve got a couple of grill pans; this one is the Lodge Pro Grid Reversible Grill/Griddle, or some version of that long name. The idea is that you have one side that’s flat for pancakes and stuff, and the other is ridged for steaks or whatever you want grill marks on. The problem is that, on the glass-top stove, very little of the pan is actually touching the stove, whichever way is up. With gas, it’s no problem, because the flames just reach up and heat the pan, but no, that’s not the way glass-top stoves work.

The caution is that if the ‘burners’ on the glass-top stove aren’t in contact with the pan, they can overheat, or other bad things. It also takes FOREVER to heat the pan, because first the electric coils have to get hot, then they have to make the glass hot, then the glass has to make the air above it hot, then the air has to get hot enough to heat the pan, which then has to get hot enough to heat whatever’s in it. (Whereas with a gas stove: you apply fire directly to the bottom of the pan. Much more efficient.)

You also have to be super careful moving cast iron pans around on a glass stove, because it’s easily scratched. (WHY WOULD YOU MAKE A SEARING HOT COOKING SURFACE THAT FRAGILE?!?!?!!?)

The good news is that it is possible to use your cast iron reversible griddle on a flat-top stove, as long as you use a little care and common sense:

1) Heat your pan gradually, and no hotter than necessary. You should always be doing this anyway, but I’m much more careful about it when the burners have so much air over them. I start off with the burners on 2 or 3, then gradually increase to 4 or 5, then usually max out at 6 or 7. The good thing about cast iron is that you don’t have to turn the burners way, way up in order to get the pan searing hot.

2) Move the pan around carefully. I have a pair of welding gloves that I use for moving heavy, hot pans, and I’m always super careful with this one. For one thing, it weighs a ton; for another, it gets HOT. So I carefully place it so that it covers as much of the burners as possible, then try not to move it. Once I’m done with it, I let it cool for a while on the stove before I take it off.

Next time I’ll show you the grill in action with the best burgers you can make in your kitchen!

Essential kitchen gear

We recently moved from southern California to south-eastern Connecticut (I think the military tried to see how far they could send us without actually leaving the country). It took us a couple of weeks to make the drive, and what with waiting for our household goods to be delivered, most of my kitchen was packed for about a month.

I have a LOT of kitchen gear, and it was a little disturbing to see how little I actually needed when I only had room for the essentials – almost everything fit into one small box! Here’s what I was able to cook with for a month:

a few knives: a chef’s knife, a paring knife, and an in-between for slicing

a medium-sized plastic cutting board

a smallish flat grater

a vegetable peeler

a can opener

a silicon-coated flat whisk (works on all pan surfaces)

a pair of silicon-coated locking tongs

a plastic bench scraper

a set of four Pyrex mixing bowls (Heavy, but microwave- and oven-proof, in a pinch. Plus they’re vintage and I didn’t want to risk them with the movers.)

wooden spoons: some round-headed for stirring, and some flat for scraping and sautéing

nylon utensils: a spatula, some serving spoons, a ladle, etc. (I have stainless steel, but like the whisk and tongs, I needed things that would work on every surface.)

measuring cups and spoons

a collapsible silicon colander

a large Dutch oven (My 6 3/4-quart enameled cast iron Dutch oven does everything from boil pasta to roast chickens.)

a large braiser (My 5-quart enameled cast iron braiser goes everywhere the Dutch oven does, but is shorter and flatter like a griddle for pancakes and stuff.)

a broiler pan (When you’re living in a house with no furniture, you end up eating a lot of frozen pizzas and things. A broiler pan give you a flat enough surface for heating frozen pizzas and breads, but have enough rim to catch juices from roasting meats.)

I think the only thing that I really wished I had brought was my knife sharpener, although if I had sharpened my knives right before the move it wouldn’t have been an issue.

Once we arrived in our new house, I was able to cook almost everything I would normally. I couldn’t bake cookies or make muffins, but I could fix dinner every night! And then I had to face unpacking dozens of boxes of kitchen gear that I had just proven that I don’t really need…

Libbey Vibe Jars: replacement parts

I recently had a commenter inquire about replacement gaskets for her Libbey Vibe glass jars. I contacted Libbey, and while they don’t sell the gaskets separately, they do sell replacement lids. Here’s the info!

Small: $0.99 each

Medium: $1.40 each

Large and Extra Large: $1.60 each

Order by calling 888-794-8469, Monday through Friday, 9:00-5:00 Eastern Time.

They accept credit cards and ship via UPS.

My favorite pan

measuring pan interior

… or is it? A pan, I mean. It’s still my favorite. It’s made out of 18/10 stainless steel, just like my pots and pans. I use it all the time…

measuring pan close up

… and it always works perfectly…

measuring pan full

… even if it is…

measuring pan bottom

… a measuring cup!

This is the Norpro 2-cup measuring cup. I love it because it is a measuring cup, a tiny saucepan, a ladle, a spoon rest, and virtually impervious to damage and destruction. (When I bought it, my daughter kept hitting it with my nice new gravy ladle. The ladle is scratched, but the measuring cup is fine.) And it was only $9!

I usually use it for melting butter or making hot chocolate on the stove. My old gas stove had a mini burner that fit this perfectly, but I can use the regular burners on my new stove as long as the gas is turned way down. You can use it on an electric stove top, too, just set it on the outside so the handle doesn’t get too hot. I find myself hardly ever using the microwave anymore; to melt butter you either have to set it for too long, then it explodes and you have to clean the microwave, or you  have to stand there heating it in 10-second increments and checking it after each one, and it will still probably explode on the last one. So I prefer to just throw the butter into this tiny pan, set it over a low heat, and carry on with my cooking, glancing at it every now and then.

I love the tiny pour spouts on both sides, so you can pour with either hand. And the measuring marks make it easy to pour in one cup of milk for hot chocolate. I use it as a ladle for things like hot soup, since all my other measuring cups and ladles are plastic.

For something that wasn’t designed for stove top use, this has stood up remarkably well. It’s made out of high-quality stainless steel, but it hasn’t discolored like my more expensive pots and pans made out of the same stuff.

My favorite thing about it is that it is so small and doesn’t take up any space in my overflowing cupboards. To wit:

measuring pan hanging

I used a tiny clear Command hook (lifesavers!) and just stuck it right next to my stove and over the overflow from my pantry cabinet so I can grab it whenever I need it.

In my someday big-kitchen future, I’ll get some real measuring pans like these. But I will always have this one near to hand as a first resort.

(You can get it on Amazon for about $8, at time of writing.)

How to separate fat from drippings

When I was growing up, gravy came out of a little paper packet. You combined the gravy powder with water in a saucepan, then whisked it constantly over heat until it boiled, then reduced the heat and let it simmer for one minute. Gravy!

When I grew up and started cooking, I learned that there is another way to make gravy! (Which makes a lot of sense, because I could never figure out how people made gravy in the olden days before paper packets.) It’s a pretty simple process, and can be a lot of fun because you get to tweak the consistency and seasonings so that it’s just the way you like it. And it keeps the drippings from being wasted, the subject of which is the topic of this post!

Drippings are the combination of fats and other liquids that drain out of a piece of meat, like a pot roast or a chicken, when it is cooked. After you have removed the meat from the cooking pan, you can pour the drippings into a container and the fat will naturally separate from the juices and float to the top. In order to make gravy (or just save the fat and juices for other purposes), you have to separate the two, and there are several ways to do it:

1) Scoop method: Use a large, flat spoon to gently scoop the fat off the top of the juices.

1a) Mop method (used in conjunction with scoop method): After using a spoon to pick up most of the fat, use a paper towel, lettuce leaf, or piece of bread to sop up the remaining fat particles. This method works for small amounts of fat only.

2) Chill and scoop method: This method works well, but takes a while. Pour the drippings into a container, then either freeze for a while, or chill overnight in the refrigerator. The fat will solidify and you can just spoon it off the top in chunks.

2a) Quick-chill method: Drop an ice cube onto the drippings to more quickly chill the fat and make it easier to remove.

3) Baster method: Pour the drippings into a container, wait for the fat to rise to the surface, then stick a baster down into the juices, suck them up, and transfer them to another container. Ideally, all the fat will be left behind.

4) Baggie method: Pour the drippings into a zip-top baggie and wait for the fat to rise to the surface. Hold the baggie over a container, then snip the corner off the baggie and let the juices drain out. As soon as the fat reaches the bottom, quickly pinch it shut, then hold the baggie over a different container and let the fat drain out.

Most people won’t want a single-use tool that takes up space just for this purpose. Unless you make roast meat and gravy all the time, in which case keep reading.

5) Fat separator: This is a tool designed especially to separate the fat from the drippings. It’s basically a little pitcher with a pour spout that attaches near the bottom. You pour the drippings into it, then let it sit until the fat floats to the top. Then you just pour the bottom juices right out from underneath the fat. A lot of separators have a strainer lid, so when you pour the drippings in, most of the big pieces of gunk get strained out. I have one each of the OXO Good Grips Fat Separator and the OXO SoftWorks Fat Separator (practically the same things) in the 2-cup version. They have stoppers for the spout that prevents fat from going up into the spout when it’s being poured in, and have strainer lids. Cook’s Illustrated recommends the Trudeau Gravy/Fat Separator, which is very similar to the OXOs; it also has a strainer lid, but has a nice wide mouth to make pouring the drippings in easier. And there are some with the traditional spout: by Catamount, by Norpro, and many others.

Instead of getting one large (4-cup) separator, I got two small (2-cup) separators, because if you have only a small amount of drippings, sometimes the spout opening is too big and lets the fat into the spout.

Whether to get glass or plastic is up to you. Glass ones tend to be fragile (especially with the long, narrow spout), but plastic has a lower heat tolerance and tends to craze and crack when hot drippings are poured in over and over.

Now for the gravy! Gravy always starts with a roux, which is a paste of fat and flour cooked together. This is something that’s usually done by look, so it’s hard to give exact proportions; some people say a 1:1 ratio of fat to flour, so that’s a good place to start. The ideal texture is a paste; if it looks too dry or too greasy, just add a little more of whichever thing you need to balance it out.

Fat, for gravy, can mean either some of the fat from your drippings, or butter, or a combination of the two if your meat wasn’t fatty enough. Melt the fat in a skillet or saucepan, then add the flour and combine them thoroughly over medium-low heat. You have to cook the roux for several minutes, otherwise the flour won’t be cooked and all your gravy will taste like is raw flour. Blegh. Use your nose and eyes; the roux will start to darken from a light yellow to a brown color, and the flour will smell cooked. You can cook it as long as you want, depending on how you like your gravy to taste. If it burns, you’ll smell it. Don’t use that for your gravy; the whole thing will taste burned. Just toss it and start with another tablespoon of fat and flour.

Once your roux has cooked enough, whisk in the liquid. You can use the dripping liquid from your meat, or, if you’re starting from scratch, whatever kind of stock goes with your dish. For country gravy, use milk. If you heavily seasoned the meat before cooking, it might be too strong to use for gravy; either thin it with some water or substitute stock or broth. I always start with a little bit of liquid and just keep adding (and whisking!) until it’s the consistency I want. Even if you mess up, it’s pretty easy to fix: if it’s too thick, add more stock (milk, water); if it’s too thin, just keep cooking it until it thickens up again.

The most important thing to remember is to add the liquid gradually, whisk constantly, and don’t add more until all the lumps are whisked out.

Taste the gravy and season it with whatever you like: salt, pepper, herbs, anything. It’s so versatile, you can make it however you want.

Homemade gravy doesn’t alway work; I’ve certainly had plenty of times when the flour wasn’t cooked enough, or was cooked too much, or the drippings were way too salty, or any number of other problems. But it’s a great thing to know how to do, in case you don’t have a little paper packet, and you don’t have to waste all the wonderful drippings from your meat!

Post Navigation